Please read the OnDemand Overview section first, if you have not already done so, before reading this section.
Initial Setup
Before running the OnDemand version, you need to contact us and ask us to set up a user login for your initial Site Administrator for the system, who will be able to set up further users. That login information will be emailed to the Administrator, within one business day, but often faster.
Next, if you have an existing version of DONATION, run it and make a database backup. Be sure you know where to find that backup.
For existing users of the Remote Database version, since that version has been discontinued and can no longer be run by users, you will have to contact us for assistance in moving its database to become your OnDemand database.
The Site Administrator can then download and install the OnDemand client from our web page https://software4nonprofits.com/pricing/donation-cloud/#step-2. After running that client program, they will login with the information that was sent to them, on a window such as the following:

Once a Site Administrator is logged in, they will be able to use a User Management application to set up further user logins, and specify whether each of those users is also a Site Administrator. See OnDemand User Management for full details.
If you feel that your computer is private and secure, and you want to avoid having to log in every time you start the OnDemand client, there are instructions on the Command Line Arguments page for adding your user name and password to the command line used for starting it. If you do that, you will have to change the command line arguments every 180 days, when the OnDemand system requires you to change your password.
Here is a sample of the window that will come up after your login:
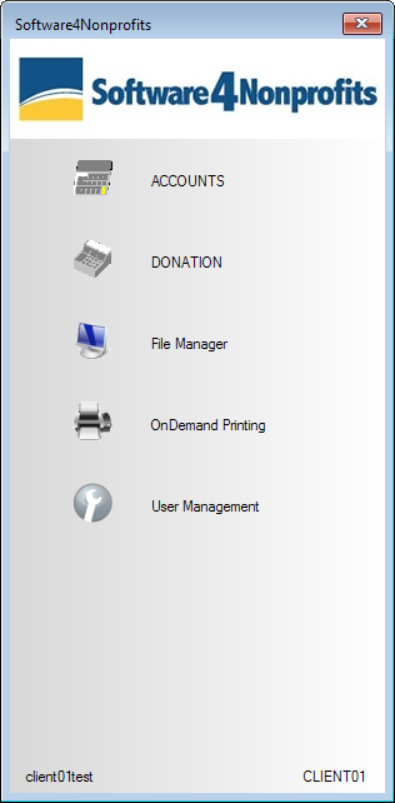
Only Site Administrators will see the User Management application. Whether or not you see both DONATION and ACCOUNTS will depend on whether they have both been configured for you by the Administrator.
To start any program from the window above, double-click on its icon or name.
You can run DONATION via the icon in the OnDemand client window. The first time you do so, it will come up with the Initial Startup window, like any first install of other versions of DONATION on a new computer.
If you are an entirely new user of DONATION (not switching from another version) just leave the first radio button checked ("I am a first time user ..."), click OK and follow the prompts to initialize your database.
If you are switching from another version of DONATION, choose the 2nd radio button option there ("I want to start by restoring a database backup ..."), and restore the database backup from your existing version, that you made above. (This is essentially like following the instructions in the Help topic Move the Program from One Computer to Another.)
Important: When you are in the OnDemand DONATION, your computer's C: drive will show up as J:. Any further drives will come up on successive drive letters, so a USB on D: will show up as K: etc. So if you are restoring a backup, those modified drive letters are where you will have to navigate to, in order to find the file on your computer.
If you attempt to log in three times in a row unsuccessfully with the same email address, the login window will exit. You can immediately start it again to try again - you are not locked out. If you have forgotten your password, a Site Administrator can reset it for you - see OnDemand User Management.
File Manager Application
On the menu window, there is an icon for File Manager. That brings up a simple window designed specifically for copying files from the OnDemand server's directories (shown on the left) to drives and directories on your computer (shown on the right), or vice versa. It should be quite obvious how to use it, with drop-down lists for the drives that can be accessed and clearly labelled buttons and toolbars with popup tooltips. If you need more help with it, there is detailed help on the ACS Technologies website (addressed specifically to their own program, ACS, but also applicable to DONATION) at https://wiki.acstechnologies.com/display/OnDemand/Transferring+Files.
In addition, you can use the DONATION program's Tools ⇒ Explore Data Directory menu option to bring up a standard Windows 10 File Explorer window that you can use for copying files (as well as just looking around). It also has access to your computer's drives.
Converting from Competitors' Databases
If you either don't have a previous local DONATION database with data in it, or choose not to upload that, but you do have a database from any of Membership Plus, GiftWorks, Geminon, PowerChurch Plus, Roll Call, or Wincrafters Church Assistant on your computer, you will be able to convert or import them, but only after initially creating a new empty database by using the first radio button option on the startup options window.
You can then do any of the conversions from the competitors' databases listed above by using an appropriate option from the Database ⇒ Import sub-menu.
Possible Connection Problem: Firewalls
Some users may get an error message when they first try to use the OnDemand Version, saying "Failed to connect to connections.ondemand.acstechnologies.com on port 491.".
If that happens, please consult the following page about this problem on the ACST OnDemand website: https://wiki.acstechnologies.com/display/OnDemand/Failed+to+connect+to+server.
See Also: OnDemand Version Overview
This topic was last edited on Aug 16, 2021