You can specify graphics files for both your organization's logo, if you have one, and the receipt signing officer's signature, via the Select Logo and Signature button in the window that comes up when you select the Maintenance ⇒ Receipt Options menu option. That brings up the following window (with some sample data shown):
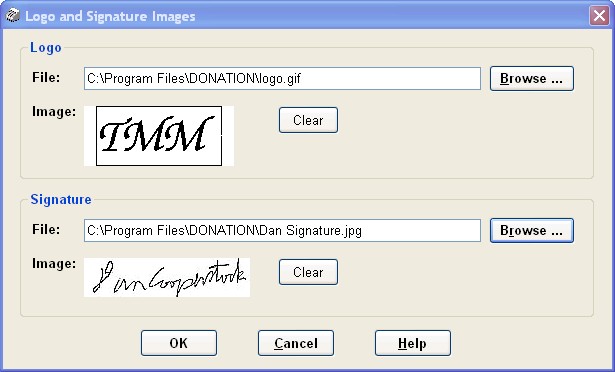
The two fields after the File prompts are not editable: you select the files using the Browse buttons. You may select files from any folder on your local hard drive, and they may be in any standard bitmap format (BMP, GIF, JPG or PNG). Once you select a file with the Browse button, the program will check that it has the correct dimensions (details below) and then display it in the corresponding Image area.
If you decide that you don't want to have one of the Logo or Signature bitmaps used, which you have previously specified, use the Clear button to remove it.
As usual, you can save your changes on this window with the OK button, or abandon your changes with the Cancel button.
Using your Logo in the Receipts
If you have an organizational logo, and specify it in the window above, it will automatically display on the program's built-in receipts, in the top right corner. (If you choose to generate receipts with Mail Merge, it will also display on them.) If you don't specify it in that window, your logo will not appear on the receipts, but they will still print fine.
The logo should be in a bitmap file as described above. Usually your organization will already have it in a separate file, at a standard desired size.
There are actually two cases, that determine the requirements for the dimensions of the logo file you will use:
1.You are using built-in receipts, and/or printing receipt or donor envelopes and choosing the option when you do so to display the logo on the envelopes. In this case, the logo's dimensions must be width 150 pixels by height 60 pixels, or any exact multiple of those dimensions. When you use one that is a multiple of those dimensions, it will be scaled to fit into the desired size of 150 x 60 when it is displayed on built-in receipts or envelopes.
2.Your only use of the logo will be on mail-merge receipts and letters. In this case, you can use any reasonable size that fits on the page (usually in the top-right corner of the receipts and letters), and the logo will be specified at the size you choose.
If you do select a logo image that is not an exact multiple of 150 x 60 pixels, you will be offered options of what to do about it, which will vary depending on whether or not you have already selected to use mail merge receipts. One of the options will be to let the program automatically fit your logo into a multiple of that desired size for use in built-in receipts and logos printed on envelopes. If you choose that option, the program will do that for you automatically, by finding the next multiple of that desired size that your selected logo will fit within, and putting it into a blank image of that size, at the bottom right corner.
Alternatively, if you are familiar with graphics editing programs such as Microsoft Paint, Photoshop or Paintshop Pro you can do such fitting into the desired dimensions (any exact multiple of 150 x 60) yourself, and then select your edited file here. However, there is no clear advantage to that over letting the program do it for you.
The same logo file is automatically included in the template mail merge receipts and mail merge letters provided with the program. However, it is not scaled to any given size - it will show up at whatever size the file actually is. So as mentioned above, if you use the mail merge receipts instead of the built-in versions, your logo doesn't actually have to be a multiple of 150 x 60 pixels in size. And if it is a multiple of that size, it will still be displayed at the full size you saved it as, not scaled down to 150 x 60. You can also alternatively edit the sample mail merge receipt, to remove that logo file and insert a different one (of any size and shape) in its place, or in a different position in the receipt.
Unless you are printing on a colour printer, this will probably look best if your bitmap is all black-and-white, or what most paint programs call two-colour or monochrome.
The same logo file can also optionally be included on envelopes that you print for donors or receipts, and it will always be scaled to 150 x 60 pixels there.
Using a Bitmap Signature on the Receipts
You can also use a bitmap for the signing officer's signature. It should be a bitmap file 166 x 39 pixels, or an exact multiple of that size, for example 332 x 78, 498 x 117 or 664 x 156. If such a file is specified in the window above, it will automatically be used on the built-in receipts, scaled to 166 x 39 pixels. If not, the space will be blank for a hand-written signature as usual.
The same bitmap signature file is also included in the sample mail merge receipts, and is also automatically scaled to 166 x 39 pixels.
To get such a file, normally the best option is to write a clear signature in black ink on a plain white piece of paper, near the top-left corner (but not right in the corner). Don't make it too large. Then scan that to an image file (GIF, JPG, BMP or PNG - but not PDF!) on your computer with a multi-function printer's scanning feature, or dedicated scanner. You will get the best results if you instruct your scanning software to scan at 300dpi (possibly also called "photo quality") or even better 600dpi, and also tell it to scan in grey scale (rather than either colour or black and white).
You can try using a digital photo of a signature, but you will have to make sure that the light is very good or you are likely to end up with a grey background when you use it! If you do use a photo, don't take it from too close up. Your results are likely to be much better if you can scan your signature rather than using a photo!
When you then select that scanned file or photo with the Browse button in the lower section of the window above, for signatures, you will receive a messagebox if the file you select is not already an exact multiple of 166 x 39 pixels (which it is very unlikely!). That messagebox will give you an option to "Edit Signature Image to Fit Standard Dimension". Choose that option, and follow the written directions on the window that comes up to click into it to draw an appropriate selection rectangle entirely surrounding your signature, and click Snip in it to save your selection as the desired signature. One thing that window does automatically is change the scanned image or photo to entirely black and white (not even any grey), which will help to avoid a light but non-white background around your signature, which can otherwise happen even with a good scan!
If this doesn't give good enough results (when you look at it on a printed sample receipt, or a sample receipt saved to PDF) you can try again with a new scan of a new signature made with darker and/or heavier ink. Also, perhaps if your first signature was quite large, try using a smaller signature, which may give better results. And as mentioned above, 300dpi or 600dpi, scanned as grey scale, will in our experience give the best results.
Some users may wish to use a password to govern the generation of receipts, since having the bitmap signature there makes it more of a one-person job that is less desirable from an audit perspective. To set up such a password, use Maintenance ⇒ Change Password ⇒ Receipt Password.
The name of the signing officer is also printed on the receipts - it is entered or updated in the Maintenance ⇒ Organization Info window.
Different Files for Different Databases
If you create and switch between multiple database for multiple organizations with the Database ⇒ Switch Databases menu option, each one needs to have its own logo and signature files specified. Just go into the Logo and Signature Images window once for each of your databases, and choose the desired files for each one. They will then be automatically used, as you switch databases.
(Previous versions of DONATION always used the file C:\Program Files\Donation\logo.bmp for the logo, and C:\Program Files\Donation\signatur.bmp for the signature, for all databases, which was much more limiting. When you first upgrade from previous versions of DONATION to version 3.30 or higher, if those files are present, they will be picked up and displayed in the window above, and used on your receipts, but you can then change them if desired.)
Moving the Program to Another Computer
When you move the program to another computer, or just transfer your database to another computer via backup and restore, any logo and signature images you have specified come with the database, so you don't have to do anything special. (The actual files are not transferred, but their contents have been loaded into the database, so you don't have to transfer the files - they will just work.)
Using the Local Network or OnDemand Versions of DONATION
If you are using the Local Network Version or OnDemand Version, you can set the logo or signature images on any of the computers running it, and then next time you start DONATION on any of the other computers, they will pick up the change.
Notes on using Bitmap Signatures for Canadian Users
The Canada Revenue Agency, on a web page about Computer-generated Receipts, has some regulations about doing this, which DONATION seems to satisfy. However, you may wish to review that page yourself to convince yourself that it is OK.
Inserting Logos and Signatures in other Mail Merge Files
If you are editing mail merge files other than the receipts, which automatically include any logo or signature image you specify in this window, you can insert those images with the editor's Insert ⇒ Logo Image or Insert ⇒ Signature Image menu options. You can also re-insert them on the mail-merge receipts with those menu options, with an option to scale or not scale them to the standard sizes (if they are a different size), after first deleting them there.
Training Video
There is a training video on Using a Logo and Signature bitmap on your Receipts on the Demos and Samples web page, if you would prefer to see this feature demonstrated live, rather than just reading about it. This might be particularly helpful if you have no idea how to go about creating graphics files with the correct dimensions, because it gives a quick introduction to doing that using the Windows Paint program.
Help with Editing your Logo and Signature Files
In the vast majority of cases, the built-in editing features in the program for sizing logos and snipping signatures out of scans should mean that even users with no knowledge of graphics editing can follow the above instructions without additional assistance.
Virtually the only case we can imagine where you might need to use a graphics program is if you are using mail-merge receipts, and your organization's logo image is just to big to fit reasonably on the receipts. In that case you could load it into an simple graphics program such as Microsoft Paint, Photoshop or Paintshop Pro and use that program's features to resize (or scale) the image to be a reasonable smaller size. If you do that, be careful to use that program's options to "maintain the aspect ratio", which means to leave the ratio of the height to the width unchanged.
Note: We're sorry, but if you need further assistance with manual graphics editing of your files using a graphics program, beyond what the program can do for you, that would not be something that is included in our usual technical support that you pay for with your Annual Fee or that is free for legacy Lite version users.
This topic was last edited on Feb 17, 2023