If you have already finished the initial setup of DONATION and gotten to the main window, please continue reading this Help page at
the section on Passwords.
Initial Startup Window
The first time you start DONATION after you install it, the program will show you the following window:
It is mostly self-explanatory, if you read it carefully. New users, whose organization has not used DONATION before, should stick with the first option (the default) and just click OK. Users who have a backup database from a previous installation, either because they have to re-install after getting a new computer or having their computer rebuilt, or because they are transferring the program from another user in their organization, should pick the second radio button option (or 3rd one if their organization had been using Internet backups, and they know the appropriate details) and click OK.
If you selected the 2nd option, to restore a backup database, you can see Restoring Backups for more details about the restore process. The further startup windows described in the section below will not be shown.
Note: If you do select this 2nd option, check the filename of the backup that you have received, or that was emailed to you. If it ends in ".GBK", do not check the checkbox below the text for this radio button. However, if the backup was emailed to you as an attachment, and it ends in ".S4B", do check the "Use emailed backup instead..." checkbox, and refer to the Restoring Emailed Backups page for more information.
If you select the 3rd option, to restore an Internet backup of your database, you can see Restoring Internet Backups for more details. You will be prompted for the Unique ID for Internet Backups that was used to make the backups, as well as the backup encryption password used (which you have to know!), as part of this process. If you reported that Unique ID to us when you first set it up, we may be able to supply it to you, if you don't have it. The following window will come up when you choose this option:
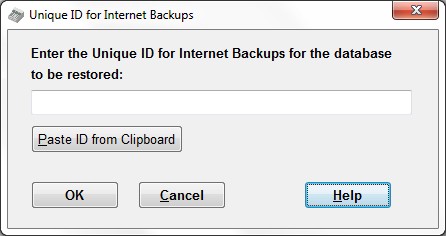
To get the Unique ID into this window, you have to first copy it to the Window clipboard from wherever you have it stored, the click the Paste ID from Clipboard button on this window to get it displayed here. (You can also carefully type it in manually, or directly paste it into the entry field.) After clicking OK and entering the Internet Backup password that it will next prompt you for, you will be able to select from the Internet backups - choose the most recent one. As with choosing the 2nd option in the window above, the further startup windows described in the section below will not be shown.
If the backup database you want to restore is named DONATION3.DB (or DONATION3.something), that is a database or backup from a very old version of DONATION (version 2.70b or earlier, from 2007 or earlier). The current version of DONATION cannot convert that, but if you contact support, we can help you convert it.
Further Startup Windows
In the more usual case where you selected the first option in either version's initial startup window, for new users, the program will prompt you with two or three additional startup windows before you can start entering donors and donations.
First window:
This defaults to the current year. However, if you have a backlog from before the current year, you can instead enter the prior year that you want to start on here. (For instance, suppose it is early in 2016, and you still haven't done anything with the donations from 2015. When it prompts for the year, enter 2015.)
If you are in a country where the tax receipting year is a fiscal year other than the calendar year, like Australia, New Zealand, or the United Kingdom, the year you select here will represent the fiscal year - from the fiscal year start in the previous calendar year, to the fiscal year end in the specified calendar year. See below for further details.
Second window:
In this window, you enter your organization's basic information (name, address, fiscal year start if different from the calendar year etc.). You can also come back later and change this basic organization information with Maintenance ⇒ Organization Info. For more details on this window, including a discussion of whether or not you should enter anything in the Charitable # field, see Editing General Info.
If you are in a country where the tax receipting year is a fiscal year other than the calendar year, like Australia, New Zealand, or the United Kingdom, it's important to check the "Use Fiscal Year Receipting and Data Entry" checkbox here. See Fiscal Year Data Entry and Receipting for full details.
Evaluation and Licensing Window
If you do not yet have a license key for your organization for DONATION, or have not yet installed it on this computer, and you aren't using the free legacy Lite version (which doesn't need license keys), the next thing you see will be the Evaluation and Licensing window. Please read the Help on that window for details. During your initial evaluation of DONATION, you can just click Continue on that window to go on to the main window.
Register the Program Window
If you have not yet registered the program, or informed the program that you have already done so online or on another computer, you will also be prompted about registering DONATION, with the following window:
You may already have registered using the form on the web site, in which case you can click the second button in the window above. If you click the first button, another window will now come up prompting you to register.
Passwords
There are several passwords you can set up in the program, for program entry with different permissions, and other purposes, with the Maintenance ⇒ Change Password sub-menu options. See the page on Passwords in the Program for full details.
For the OnDemand Version this is done differently, with login user names and passwords, not just passwords. You will use the OnDemand User Management application, and the DONATION program's Maintenance ⇒ Administer All Users menu option, to add additional users and set their permissions. See OnDemand User Management for full details.
Other Initial Setup
Additional setup you may wish to do before you start using DONATION includes:
•Set up Donation Categories with Maintenance ⇒ Donation Categories. (You can do this as needed, by using the "<Add New>" option on the donation Category pull-down when you are entering donations.)
•Set up Donor Categories with Maintenance ⇒ Donor Category 1 and Donor Category 2, if you wish to categorize your donors. (There is an "<Add New>" button for them as well.)
•Edit various options for what you see on the Main Window, with Maintenance ⇒ Main Window Options.
•Edit various options for the creation of official receipts, and mail-merging using the Letters menu options, with Maintenance ⇒ Receipt Options.
See also: the Regular Operating Procedures page for an introduction to your daily activities, and the Main Window page for a description of that window.
This topic was last edited on Mar 21, 2023